Node.JS Installation Last updated: 18/03/2020
Welcome to the Node.JS Installation tutorial. This page will guide you through installing Node.JS step by step.
Step 1: Download the Node.JS Installer
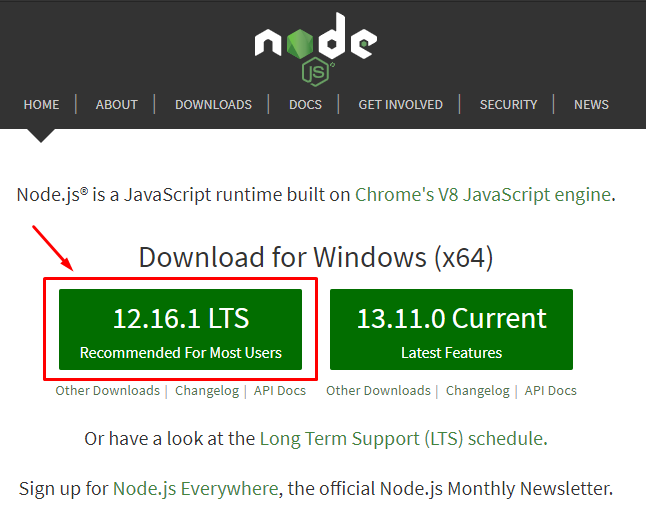
In a web browser, navigate to the Node.JS website. Click the Windows Installer button to download the latest default version. The Node.JS installer includes the NPM package manager.
Step 2: Install Node.js and NPM
- Once the installer finishes downloading, launch it. Browse to the location where you have saved the file and double-click it to launch.
- The system will ask if you want to run the software – click Run.
- You will be welcomed to the Node.js Setup Wizard – click Next.
- On the next screen, review the license agreement. Click Next if you agree to the terms and install the software.
- The installer will prompt you for the installation location. Leave the default location, unless you have a specific need to install it somewhere else – then click Next.
- The wizard will let you select components to include or remove from the installation. Again, unless you have a specific need, accept the defaults by clicking Next.
- Finally, click the Install button to run the installer. When it finishes, click Finish.
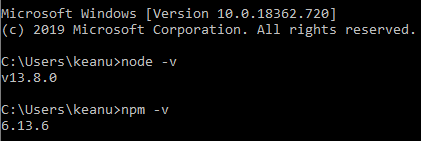
Step 3: Verify Installation
Open a command prompt (or PowerShell), and enter the following:
node -v
The system should display the Node.js version installed on your system. You can do the same for NPM:
npm -v